Retail salesmen and interior designers, rejoice! Our brand-new Photo Mode is here to make your creative process faster and easier. Whether you’re preparing a stunning proposal for a client or designing the perfect store setup, this feature lets you preview camera angles instantly before committing to a full render.
How to Use Photo Mode
Getting started with Photo Mode is as simple as it gets. Here’s how you can make the most of it:
1. Enter Photo Mode
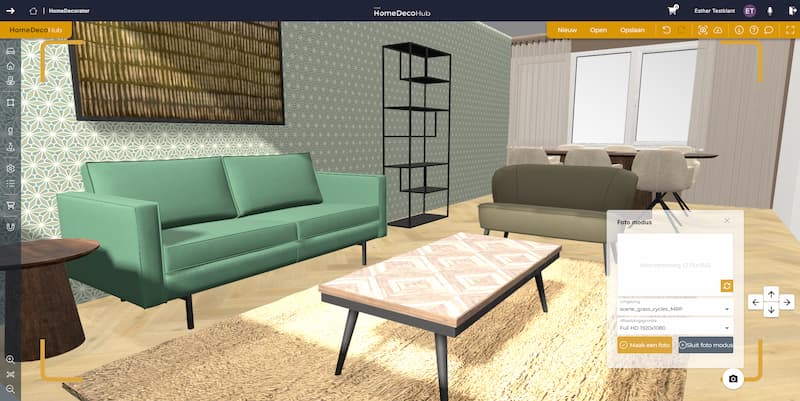
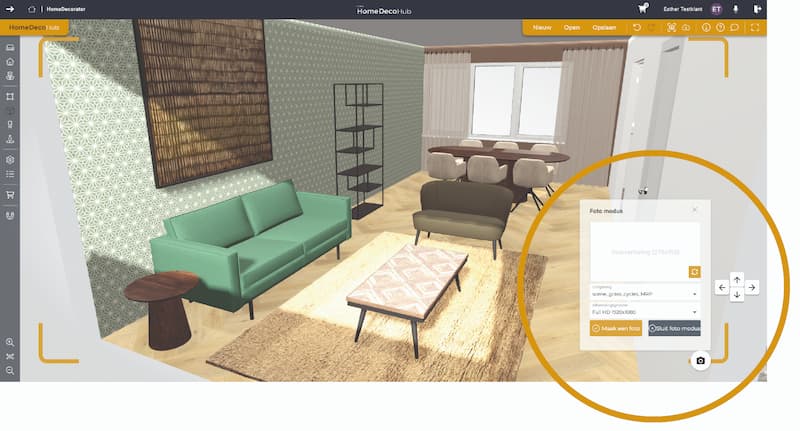
- Click on the camera icon in the bottom-right corner to activate the render and photo mode.
- A preview window will pop up in the same corner.
2. Set the Perfect Angle
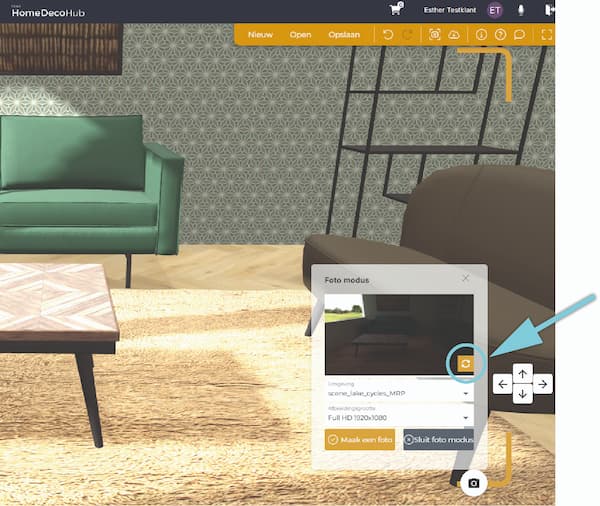
- Initially, the preview window will be empty. Adjust your camera to find the right angle.
- Click the refresh icon in the preview window, and within seconds, you’ll see a preview render of your selected angle.
- Not satisfied with the angle? No problem! Keep clicking the refresh button as you try different views.
Note: if you’ve made changes to the layout or repositioned items, you’ll need to close and re-open Photo Mode for the updates to appear in future previews.
3. Time to Render
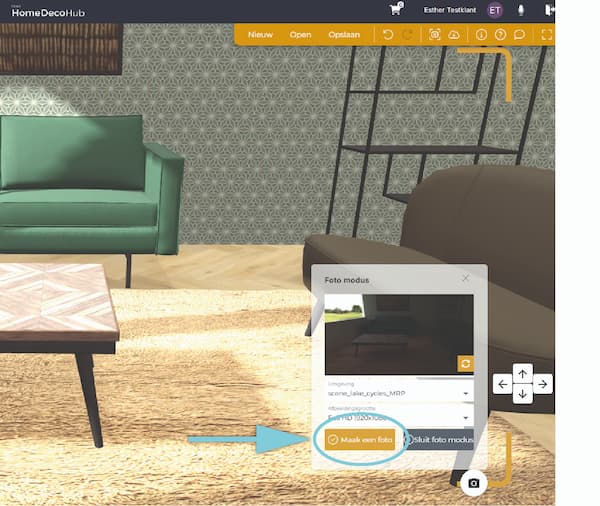
- Once you’ve found the perfect angle, click the yellow ‘Take a Picture’ button.
- Before rendering, double-check your environment and image size settings to ensure everything is just right.
Create Stunning Images - Faster than Ever
Gone are the days of waiting for a full render just to check if your camera angle works. With Photo Mode, you can save time, refine your designs, and ensure each shot is exactly how you envision it—all before hitting the “render” button. So, what are you waiting for? Dive into Photo Mode, explore your creativity, and make every render picture-perfect.